This tutorial was written by Denise Knapp at DIY-Crush.com
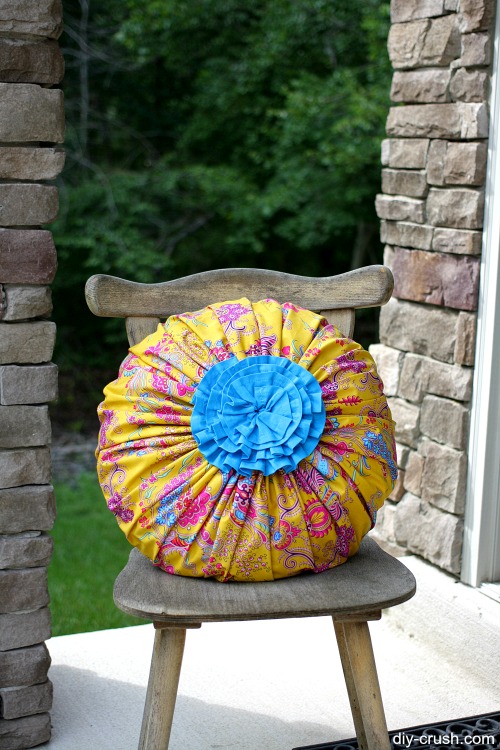
A while ago I did a review for PillowCubes.com and just loved the pillow I got. It was a round 20" pillow, very well manufactured and super thick and soft. I used it to make this Blossom Doily Pillow Sewing Pattern. Today I am thrilled to be here at PillowCubes with a free tutorial for a ruffled pillow topper tutorial! I used the free pillow pattern I made but this time I added a huge ruffle cover. This round pillowcase pattern has an opening with drawstrings to close the pillowcase with and originally I added some hand crocheted pads. The ruffle is so different and adds so much drama to this pillow and it is very easy to make.
Gather Your Materials:
- round 20" pillow form from PillowCubes
- download the pattern and make the round pillowcase
- 3/4 yard of non-stretch cotton fabric
- 6x6 piece of felt
- sewing machine
- serger
- thread
- straight pins
- 3 safety pins
Follow this step-by-step tutorial:
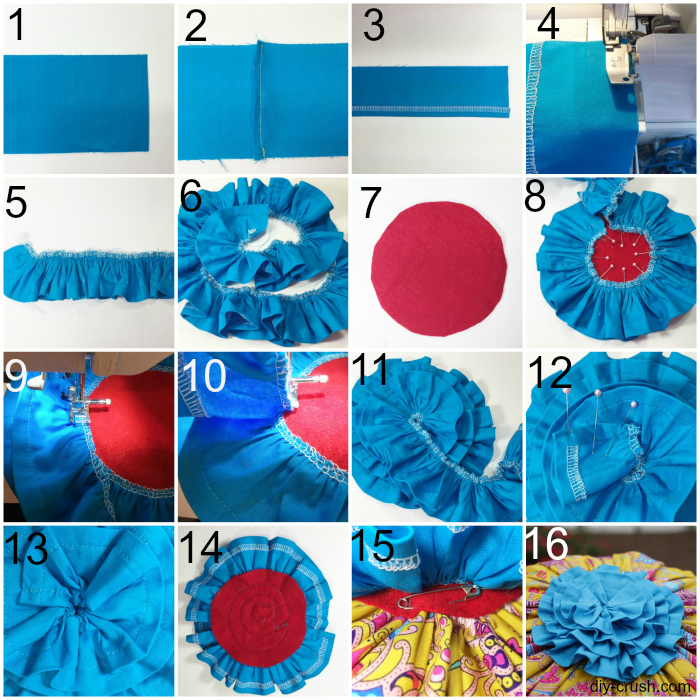
- Cut 3 strips of fabric, 4" long
- Sew all 3 strips together on the short ends so you will end up with a long strip of fabric (don't sew the ends together)
- Serge the bottom edge and fold it up towards the wrong side of the fabric, press in place and sew it down along the serged stitches
- Using your serger (set on ruffle mode), serge the top edge and at the same time, gather the fabric as tightly as possible
- This is your gathered ruffle
- (NOTE: if the gathers are not tight enough to look like in this picture, you may hand gather over the serged stitches to pull the ruffle tighter together - the tighter the better as it will result in a prettier ruffle once it's done)
- Cut out a 6" felt circle
- Start arranging the ruffle over the entire felt circle to check the fit. Then pin the ruffle to the outer circle edge so that the ruffle hangs over about 2".
- Using a straight stitch, start sewing the ruffle on right over the serged stitches. Sew only until the ruffle forms the first full circle.
- Remove the straight pins and start forming a second circle by pinning the ruffle in the same fashion as with the first one, only slightly next to the first stitched row.
- Repeat the steps until your ruffle fully covers the felt circle. You may have some ruffle left over
- Trim off the remaining ruffle and fold down the short end twice at 1/2" and either hand stitch the fold down or use your sewing machine
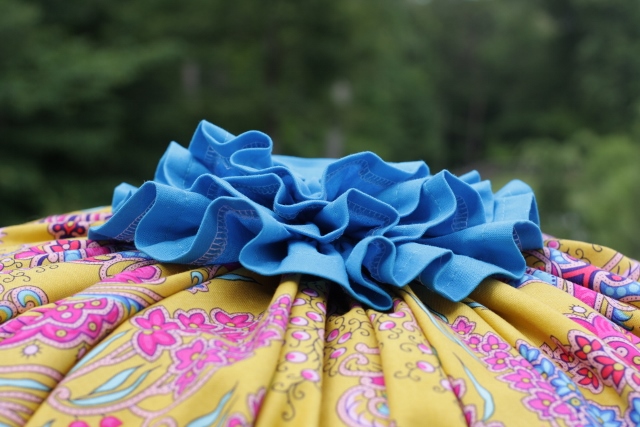
- To secure the ruffle end, hand stitch it to the center of the circle
- This is what your ruffle looks like from underneath
- It's time to pin the ruffle to your pillow by using the 3 safety pins
Your Ruffled Pillow Is Done!
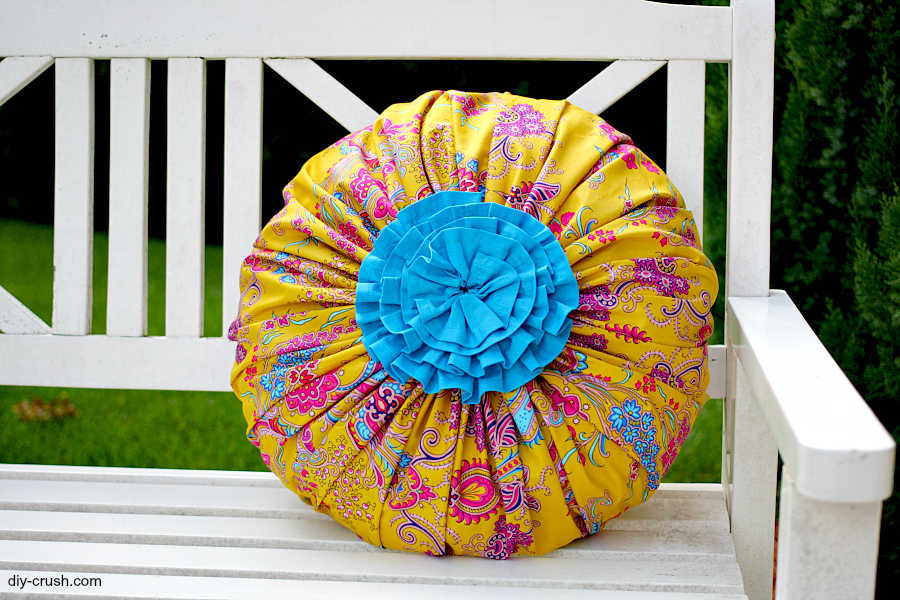
Pick a place that needs some pretty and showcase your finished pillow! Tip: before washing the pillowcase, remove the safety pins.
See you next time! ;)
Denise Knapp Owner | DIY Crush